Sunday, December 26, 2010

Inspirational Swag Tutorial


I'm so excited... my wonderful boys got me a Cricut Expression for Christmas! I have been playing with it and trying out all of it's amazing features. I had been wanting one to make stencils with, but am finding out it does so much more.


I took the doors off the closet in the studio and added a shelf just for the Cricut. My first project was the "dream" swag below.


 It was super easy to make and I can't wait to do some more using different inspirational words. These would be so cute in a little girls room, nursery, or hung from the mantel at Christmas.

 I have included a tutorial below if you would like to make one for yourself. This is my first tutorial, so if anything is unclear, please let me know so I can help.


You will need:
8.5 x 11 cardstock for the pendants (each sheet makes two)
12x12 decorative paper for rosettes (each sheet makes two)
12x12 contrasting decorative paper for centers
cardboard or other cutout letters ( I cut mine from cardstock with the Cricut)
glue
small clothespins
glitter or other embelishments
hole punch
ribbon or twine

You will need to adjust the quantities of paper etc. depending on how many letters are in your word.


Start with how ever many sheets of 8.5 x 11 cardstock you will need for your pendant backs (one sheet makes two) Cut in half so you have two 5.5 x 8.5 pieces as shown, mark the bottom center point of each half. Measure down 3" from top on each side of each half and draw a line to your mark at bottom and cut.


Cut 12 x 12 sheets in half and fold short ends accordian style as shown. Make one for each pendant or letter


Staple once in the middle to secure


Glue along the two long, outer edges of each folded paper
 ( I used way too much glue here)


Form into circles and clothespin together until dry


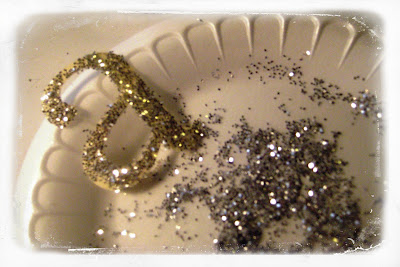
Apply glue to back of letters and glitter or embellish to your liking


Cut circles out of contrasting decorative paper with pinking shears or other scissors with a pretty cutting edge. Glue letters on to circles.


Spray glitter front of pendant backs and punch a hole near top corners


Put a nickle sized blob of clear caulking or thick glue on the back of your rosettes and attach to pendants


Repeat with caulking on front of rosettes


Glue circles with letters on rosettes. String ribbon or twine
through holes from front to back.

Hang and enjoy!


I am linking this to White Wednesday at 

 thanks for stopping by,

~ShawNa~

Wednesday, December 22, 2010

In My Next Life


I have decided if there is such a thing as reincarnation, I want to come back as one of my pets...


This is Jinx overseeing things in the studio


Miss Roxy Jean...
I had been looking for one of these old laundry carts to put throws in and finally found one last week. I hadn't had it in the house for ten minutes before Roxy climbed up over the couch and decided it would make a nice bed, and the perfect height for her to look out the window.


I found this table on Craigslist and cut the legs down to make it into a coffee table. I like the size of it and apparently Jinx does too! (yes, she weighs more than Roxy)


I can't believe it's only three days until Christmas. This year has really flown by. I hope you all have a wonderful and safe holiday and may 2011 be filled with joy.

See you soon

~ShawNa~

Sunday, December 19, 2010

Our White Christmas


Well I got my wish...we woke up to lots of snow on Friday so school was cancelled and Luke got an extra day added to his Christmas break.


I have been busy getting presents wrapped and the house decorated with everything white, of course


I got out my Margaret Furlong ornaments for the first time in several years. My sweet Gramma bought me a set every year, for many years, so I have over a hundred of them.


They are porcelain bisque and are so pretty and delicate. I toured her studio in Salem, Oregon several years ago and it was really fun to see how they are made


The tree topper is my favorite


I'm finally finished wrapping all the presents. Hooray!   Now I can relax and enjoy a nice quiet Christmas with my boys.

See you soon,

~ShawNa~


Thursday, December 16, 2010

Our First Snow

We finally
had our first snow lastnight.  We only had a couple of inches but it has been snowing all day so hopefully it will stick. It would be nice to have a white Christmas.


I found this old chafing dish at the salvation army for $4. It was missing the bowl so I added one that I already had. I think it makes a great display for these lovely little ornaments.


buttons, buttons, everywhere.... 
 I saw a great display at Red Shed Antiques in Grapevine Texas and the shop owner was kind enough to let me take a photo so I could copy it. I have been searching for just the right birdbath and finally found one. I put an old stadium light lense on top for a great table. It's really fun because you can put all kinds of goodies under the glass.


 I Found these little oilers for $6 each.  Really great to hold a thought for the day


I have been busy making some Christmas ornaments with everything vintage


This is the chandelier that I made at a workshop in Portland by Sally Jean Alexander I have it hanging in the store and have had so many ladies interested in making one that we are going to have our own workshop next month. I'm very excited to see how they all end up!


This is our Blessing Tree.
People can donate $1 and write something they are thankful for on a card and hang it on the tree. The money goes to a local charity. I am so fortunate and have so much to be grateful for.

Have A Safe And Blessed Holiday

~ShawNa~


Friday, December 10, 2010

Getting Inspired...

 I have been working on getting this blog started for quite a while now. I have a little blog that I send to my family to keep them updated on what we are up to but I wanted this to be seperate from that, and to focus on my shop, jewelry, and other creative projects. I also just got my Etsy store and website up and running and am slowly, but surely getting my jewelry posted on them. I fell in love with the website design by Catherine at

So here I go with my first post...
I have been working really hard at transitioning the shop to give it a fresh new look. I wanted to make it very monochromatic but with lots of texture.


I have been finding inspiration everywhere, and I am really pleased with the way it's coming along. 


I have a new found love for chalk cloth, chalk paper, and chalk pens. The adorable burlap gift bag below  is from
South House Boutique.


I will post more photos as things progress.

Thank you so much for stopping by
~ShawNa~